
Day 7: RAG with OpenSearch
Your chatbot confidently told a customer the wrong return policy. Again. RAG fixes that.

The Problem Nobody Talks About
You built a chatbot. It sounds smart. It responds instantly. Users love it.
Then someone asks about your company’s refund policy.
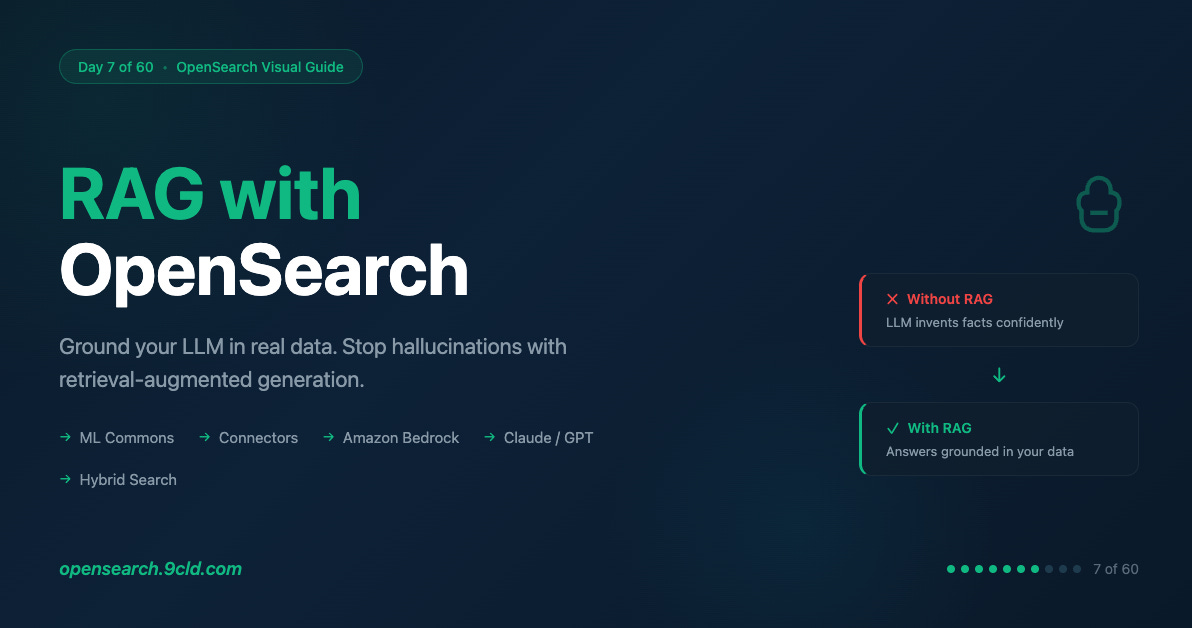
The LLM confidently invents one. Wrong dates. Wrong percentages. Completely made up.
You trained it on your data, right? No. You fine-tuned it? Too expensive. You hoped it would just know? That is what we all did.
The gap between “AI that sounds smart” and “AI that is actually correct” is where most GenAI projects fail.
RAG bridges that gap.
What is RAG, Really?
RAG stands for Retrieval-Augmented Generation. Fancy name. Simple idea.
Instead of asking the LLM to remember everything, you give it a search engine.
User asks a question. You search your knowledge base for relevant documents. You stuff those documents into the LLM prompt. The LLM generates an answer using your actual data.
The LLM does not hallucinate because it is not guessing. It is reading.
Think of it like this. You do not memorize every fact in your company handbook. You look things up when someone asks. RAG makes your AI do the same thing.
Why OpenSearch for RAG?
You could use any vector database. Pinecone. Weaviate. Chroma. They all store embeddings and find similar vectors.
So why OpenSearch?
OpenSearch does more than vector search.
Most RAG tutorials show you the happy path. Embed query, find similar chunks, done. Real-world RAG is messier.
What if the user asks “What was our Q3 revenue?” A vector search finds documents about revenue, but you also need exact keyword matching to get Q3 and not Q2.
You need date filtering to get this year and not last year.
You need aggregations to sum the numbers, not just find them.
You need metadata filtering to restrict results to the finance department.
Vector-only databases cannot do this. You end up bolting on a second search system.
OpenSearch gives you hybrid search out of the box. Vectors plus keywords plus filters plus aggregations. One system.
OpenSearch also has a native RAG processor.
Most RAG implementations work like this.
You search OpenSearch.
You pull results into your application.
You build the prompt in Python.
You send it to the LLM.
You return the response.
Five steps, lots of code.
OpenSearch does all of this inside a search pipeline.
Query hits OpenSearch.
RAG processor retrieves context, calls LLM, and returns grounded answer.
One API call. Your application stays simple.
The Architecture
Before we build, let us understand what we are building.
The flow starts with your application. User asks something like “What is our refund policy?” That query goes to OpenSearch.
Inside OpenSearch, there are two pipelines. The ingest pipeline handles documents when you add them.
It chunks long documents into smaller pieces, converts those chunks into vectors using an embedding model, and stores everything in the index.
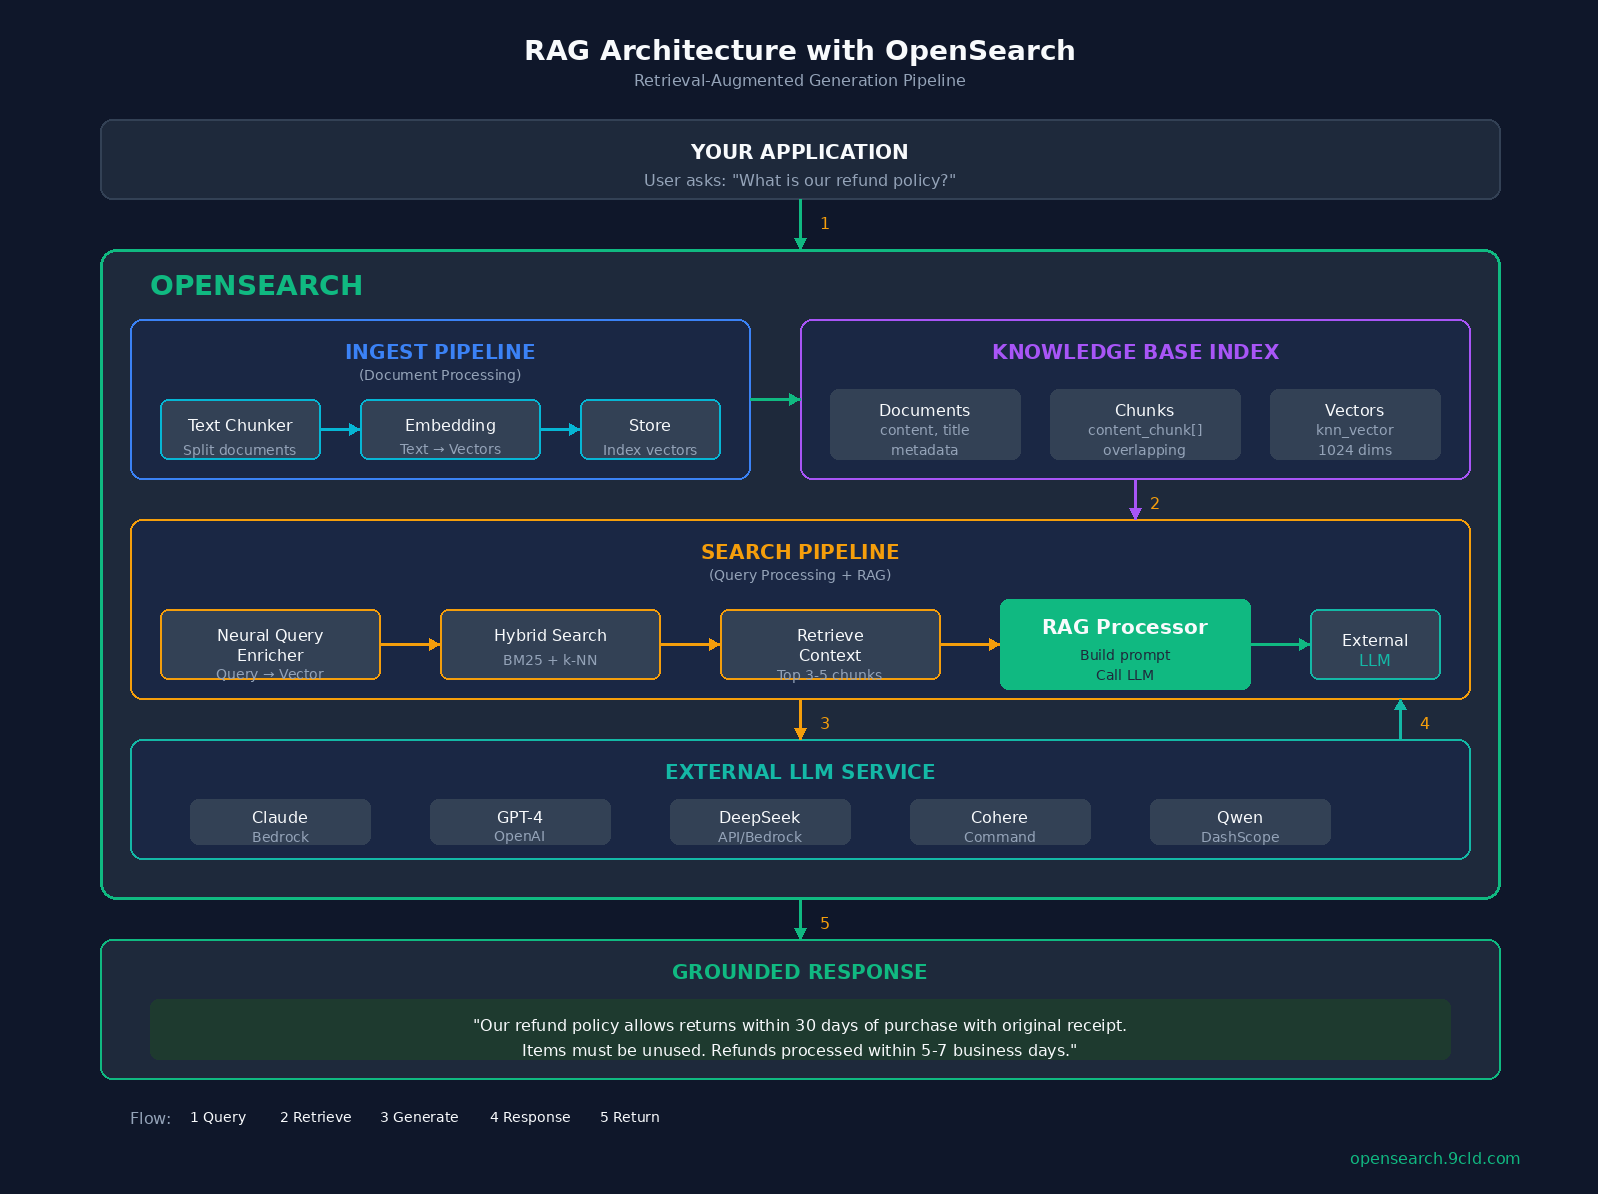
The search pipeline handles queries. It takes the user’s question, converts it to a vector using the same embedding model, finds relevant chunks using hybrid search (both vector similarity and keyword matching), and then the RAG processor takes over.
It grabs the top chunks as context, builds a prompt, calls your LLM (Claude, GPT, DeepSeek, whatever you configured), and returns the grounded answer.
The key insight is that OpenSearch handles both retrieval and orchestration. The LLM only does generation.
The Components
Let us break down each piece before we start building.
Connectors are bridges between OpenSearch and external AI services. You need two of them.
An embedding connector that converts text to vectors, and an LLM connector that generates answers.
Think of connectors as API configurations. They store endpoints, credentials, and request templates.
ML Models wrap connectors in a deployable unit. This sounds redundant, but it gives you versioning so you can roll back bad models, access control so you can restrict who uses what, and resource management for memory limits.
Ingest Pipelines process documents before storing them.
For RAG, you need text chunking to split long documents into smaller pieces, and text embedding to convert those chunks into vectors. Why chunk? LLMs have context limits.
You cannot stuff a 50-page document into a prompt. Chunking creates bite-sized pieces that fit.
Search Pipelines process queries and results.
For RAG, you need a neural query enricher to convert query text into a vector, and the RAG processor to retrieve context, call the LLM, and return the answer.
Building RAG: Step by Step
Now we build. I will explain each step, then show the code.
Step 1: Enable ML Commons
OpenSearch’s ML features are disabled by default. You need to enable them.
PUT _cluster/settings
{
  "persistent": {
    "plugins.ml_commons.only_run_on_ml_node": false,
    "plugins.ml_commons.memory_feature_enabled": true,
    "plugins.ml_commons.rag_pipeline_feature_enabled": true,
    "plugins.ml_commons.connector_access_control_enabled": true,
    "plugins.ml_commons.model_access_control_enabled": true
  }
}
Why these settings? The only_run_on_ml_node setting lets you run models on any node, not just dedicated ML nodes. Good for development, not production.
The memory_feature_enabled setting enables conversation memory for multi-turn chat.
The rag_pipeline_feature_enabled setting enables the RAG processor in search pipelines.
The two access control settings restrict who can create connectors and deploy models. Security matters.
Step 2: Create a Model Group
Model groups control access to models. Think of them as folders with permissions.
POST _plugins/_ml/model_groups/_register
{
  "name": "rag-model-group",
  "description": "Models for RAG pipeline",
  "access_mode": "public"
}
This returns a model_group_id. Save it. You will need it for every model you register.
Step 3: Register the Embedding Connector
Now we connect to an embedding service. This example uses Amazon Bedrock with Titan Embeddings.
POST _plugins/_ml/connectors/_create
{
  "name": "Amazon Bedrock Titan Embedding Connector",
  "description": "Connector for Titan Embeddings V2",
  "version": 1,
  "protocol": "aws_sigv4",
  "parameters": {
    "region": "us-east-1",
    "service_name": "bedrock",
    "model": "amazon.titan-embed-text-v2:0"
  },
  "credential": {
    "roleArn": "arn:aws:iam::YOUR_ACCOUNT:role/OpenSearchBedrockRole"
  },
  "actions": [
    {
      "action_type": "predict",
      "method": "POST",
      "url": "https://bedrock-runtime.us-east-1.amazonaws.com/model/amazon.titan-embed-text-v2:0/invoke",
      "headers": {
        "content-type": "application/json"
      },
      "request_body": "{ \"inputText\": \"${parameters.inputText}\", \"dimensions\": 1024, \"normalize\": true }",
      "pre_process_function": "connector.pre_process.bedrock.embedding",
      "post_process_function": "connector.post_process.bedrock.embedding"
    }
  ]
}
What is happening here?
The
protocol: aws_sigv4uses AWS IAM for authentication. No API keys stored in your cluster.The
parameterssection defines the AWS region and Bedrock model.The
credential.roleArnis the IAM role OpenSearch assumes to call Bedrock.The
actionssection defines how to call the API.The
request_bodytemplate injects your text.The pre and post process functions are built-in helpers that format requests and parse responses.
Save the returned connector_id.
Step 4: Register and Deploy the Embedding Model
Wrap the connector in a model.
POST _plugins/_ml/models/_register
{
  "name": "Titan Embedding Model",
  "function_name": "remote",
  "model_group_id": "YOUR_MODEL_GROUP_ID",
  "description": "Titan Text Embeddings V2 for RAG",
  "connector_id": "YOUR_EMBEDDING_CONNECTOR_ID"
}
This returns a model_id and a task_id. The model registers asynchronously. Check the status with GET _plugins/_ml/tasks/YOUR_TASK_ID.
Once complete, deploy the model.
POST _plugins/_ml/models/YOUR_EMBEDDING_MODEL_ID/_deployNow your embedding model is ready.
Step 5: Register the LLM Connector
Same process for the LLM. This example uses Claude 3 Sonnet on Bedrock.
POST _plugins/_ml/connectors/_create
{
  "name": "Amazon Bedrock Claude Connector",
  "description": "Connector for Claude 3 Sonnet",
  "version": 1,
  "protocol": "aws_sigv4",
  "parameters": {
    "region": "us-east-1",
    "service_name": "bedrock",
    "model": "anthropic.claude-3-sonnet-20240229-v1:0"
  },
  "credential": {
    "roleArn": "arn:aws:iam::YOUR_ACCOUNT:role/OpenSearchBedrockRole"
  },
  "actions": [
    {
      "action_type": "predict",
      "method": "POST",
      "url": "https://bedrock-runtime.us-east-1.amazonaws.com/model/anthropic.claude-3-sonnet-20240229-v1:0/invoke",
      "headers": {
        "content-type": "application/json"
      },
      "request_body": "{ \"anthropic_version\": \"bedrock-2023-05-31\", \"max_tokens\": 1024, \"messages\": [{\"role\": \"user\", \"content\": \"${parameters.prompt}\"}] }",
      "post_process_function": "\n  StringBuilder sb = new StringBuilder();\n  for (int i=0; i<params.content.length(); i++) {\n    sb.append(params.content[i].text);\n  }\n  return sb.toString();\n  "
    }
  ]
}
The post_process_function is Painless script that extracts the text from Claude’s response format.
Step 6: Register and Deploy the LLM Model
POST _plugins/_ml/models/_register
{
  "name": "Claude 3 Sonnet Model",
  "function_name": "remote",
  "model_group_id": "YOUR_MODEL_GROUP_ID",
  "description": "Claude 3 Sonnet for RAG generation",
  "connector_id": "YOUR_LLM_CONNECTOR_ID"
}
Wait for registration, then deploy.
POST _plugins/_ml/models/YOUR_LLM_MODEL_ID/_deployStep 7: Create the Ingest Pipeline
Now we create the pipeline that processes documents.
PUT _ingest/pipeline/rag-ingest-pipeline
{
  "description": "Pipeline for RAG document processing",
  "processors": [
    {
      "text_chunking": {
        "algorithm": {
          "fixed_token_length": {
            "token_limit": 384,
            "overlap_rate": 0.2,
            "tokenizer": "standard"
          }
        },
        "field_map": {
          "content": "content_chunk"
        }
      }
    },
    {
      "text_embedding": {
        "model_id": "YOUR_EMBEDDING_MODEL_ID",
        "field_map": {
          "content_chunk": "content_embedding"
        }
      }
    }
  ]
}
The text chunking processor splits documents.
Each chunk is at most 384 tokens, which is about 300 words. The 20% overlap prevents losing context at chunk boundaries.
The field_map takes the content field and outputs content_chunk as an array of chunks.
The text embedding processor takes each chunk, calls the embedding model, and stores vectors in content_embedding.
Why 384 tokens? It is a balance. Too small and you lose context. Too large and retrieval gets fuzzy. 256 to 512 is the sweet spot for most use cases.
Step 8: Create the Knowledge Base Index
Now create an index that stores your documents.
PUT /knowledge-base
{
  "settings": {
    "index.knn": true,
    "default_pipeline": "rag-ingest-pipeline",
    "number_of_shards": 2,
    "number_of_replicas": 1
  },
  "mappings": {
    "properties": {
      "title": { "type": "text" },
      "content": { "type": "text" },
      "content_chunk": { "type": "text" },
      "content_embedding": {
        "type": "knn_vector",
        "dimension": 1024,
        "method": {
          "name": "hnsw",
          "space_type": "l2",
          "engine": "lucene",
          "parameters": {
            "ef_construction": 128,
            "m": 16
          }
        }
      },
      "source": { "type": "keyword" },
      "last_updated": { "type": "date" }
    }
  }
}
The index.knn: true enables vector search.
The default_pipeline means every document goes through the ingest pipeline automatically.
The dimension: 1024 must match your embedding model’s output.
The method.name: hnsw is the HNSW algorithm for fast approximate nearest neighbor search.
The ef_construction and m parameters tune the algorithm. Higher values mean better recall but slower indexing.
Step 9: Create the Search Pipeline
This is where RAG happens.
PUT _search/pipeline/rag-search-pipeline
{
  "description": "RAG search pipeline",
  "request_processors": [
    {
      "neural_query_enricher": {
        "default_model_id": "YOUR_EMBEDDING_MODEL_ID",
        "neural_field_default_id": {
          "content_embedding": "YOUR_EMBEDDING_MODEL_ID"
        }
      }
    }
  ],
  "response_processors": [
    {
      "retrieval_augmented_generation": {
        "model_id": "YOUR_LLM_MODEL_ID",
        "context_field_list": ["content_chunk"],
        "system_prompt": "You are a helpful assistant that answers questions based on the provided context. If the context does not contain enough information to answer the question, say so. Do not make up information.",
        "user_instructions": "Answer the following question based on the context provided:"
      }
    }
  ]
}
Request processors run before the search. The neural query enricher converts your text query into a vector automatically.
Response processors run after the search.
The retrieval_augmented_generation processor takes search results, builds a prompt, calls the LLM, and returns the answer.
The context_field_list specifies which fields to include as context.
The system_prompt is critical. It tells the LLM to stay grounded. Without it, the LLM might still hallucinate.
The user_instructions get prepended to the user’s question.
Step 10: Index Your Documents
Now add your knowledge base.
POST /knowledge-base/_doc
{
  "title": "Refund Policy",
  "content": "Our refund policy allows customers to return items within 30 days of purchase. Items must be unused and in original packaging. A valid receipt is required for all returns. Refunds are processed within 5-7 business days after we receive the returned item. Shipping costs are non-refundable unless the return is due to our error.",
  "source": "policies/refund.md",
  "last_updated": "2024-01-15"
}
The ingest pipeline automatically chunks the content, embeds each chunk, and stores everything. Add more documents the same way.
Step 11: Query with RAG
Finally, ask a question.
POST /knowledge-base/_search?search_pipeline=rag-search-pipeline
{
  "query": {
    "hybrid": {
      "queries": [
        {
          "match": {
            "content_chunk": {
              "query": "What is the refund policy?"
            }
          }
        },
        {
          "neural": {
            "content_embedding": {
              "query_text": "What is the refund policy?",
              "k": 5
            }
          }
        }
      ]
    }
  },
  "size": 3,
  "ext": {
    "generative_qa_parameters": {
      "llm_question": "What is the refund policy?"
    }
  }
}
The hybrid search runs both keyword match and vector search. The neural query enricher already converted text to vector.
The size of 3 returns the top 3 chunks as context.
The generative_qa_parameters tells the RAG processor what question to answer.
The response includes standard search hits (the chunks that matched) and an ext.retrieval_augmented_generation.answer field with the LLM’s grounded response.
AWS vs Alibaba Cloud
If you are deploying to production, here is what changes.
On AWS OpenSearch Service, you use Amazon Bedrock for both embeddings and LLM. Claude, Titan, Cohere, and DeepSeek-R1 are all available.
Authentication works via IAM roles, which is recommended, or access keys. Native integration with SageMaker gives you custom models. Expect to pay around $300 per month for 2x r6g.large nodes plus about $15 per million tokens for Claude.
On Alibaba Cloud OpenSearch, you use Model Studio (DashScope) for LLM access and PAI (Platform for AI) for custom embeddings.
Qwen models replace Claude. RAM roles replace IAM. The connector API structure is different. Expect around $250 per month for comparable nodes plus about $10 per million tokens for Qwen.
The OpenSearch APIs are identical. Only the connectors change.
Production Checklist
Before you ship, there are things to verify.
For search quality, use hybrid search, not just vectors. Keywords matter for precision. Include metadata in context like source and date. This helps the LLM cite sources.
Test with adversarial questions like “What color is the CEO’s car?” The system should say “I do not know.” Monitor hallucination rate by tracking questions where the answer is not in the context.
For performance, add reranking for better precision. Tune chunk size based on your content. Shorter chunks work better for FAQs, longer for documentation. Consider caching frequent queries. Set LLM timeout appropriately, usually 30 to 60 seconds.
For security, use IAM roles rather than access keys. Enable model access control. Audit who creates connectors. Do not expose RAG endpoints publicly without authentication.
For cost, remember that embedding calls happen on every document ingest, and LLM calls happen on every query. Monitor token usage. Consider smaller models for simple Q&A.
Common Mistakes
Vector-only retrieval. Vector search finds semantically similar content. But “Q3” and “Q2” are semantically similar. Keyword search catches exact matches. Use hybrid.
No system prompt. Without instructions, the LLM will make things up. Always tell it to stay grounded and admit when it does not know.
Too many chunks in context. More context is not always better. Irrelevant chunks confuse the LLM. Start with 3 to 5, tune from there.
No metadata. If the LLM cannot cite sources, users do not trust the answer. Include the source and date in every document.
What is Next?
You now have a complete RAG pipeline running in OpenSearch. Your chatbot reads your actual data instead of making things up.
In Day 8, we go deeper into AI agents. Systems that can plan, reason, and take actions autonomously using OpenSearch as their knowledge backbone.
The foundation is set. Time to build intelligence on top.
Interactive Guide: https://opensearch.9cld.com/day/07-rag
Full Series: https://opensearch.9cld.com/
This piece really made me think about the critical importance of RAG in bridging the gap between superficially smart AI and trully accurate systems and thank you for articulating it so clearly.